Most AI video tools give you a single prompt box. You type, you pray, you get one
clip, and if it's wrong you start over with no idea which knob to turn. That's
fine for a one-off. It falls apart the moment you need to make ad video the way
performance marketers actually work — the same structure, over and over, with
one variable changed each time so you can read what moved.
HeyDreaming's node Canvas is the answer to that. It's a visual, node-based
workflow builder: you drop nodes onto a board, wire them together, and the graph
decides what runs. Think of it as a pipeline you can see — closer to a
ComfyUI-style editor than a chat box, but built for ad video and wired into
scoring, so every cut comes back graded on Hook, Retention, CTA and Brand-fit
before you put budget behind it.
TL;DR — Open the Canvas tab, drop a template, and wire nodes into a
graph: an input (prompt or a reference image/video), a required video step,
then optional voice, subtitles, BGM and a composer. The wiring — not a hidden
setting — decides which steps run. Save it as a named workflow and it becomes
a repeatable machine: change one node, re-run, compare the scores. That's how
you test creative like an engineer instead of gambling on one render.
Why a node graph beats a prompt box for ads
A prompt box has one problem that never goes away: it hides the pipeline. Behind
that single field there's usually an image step, a video step, maybe a voiceover,
subtitles, a music bed, a final compose. You don't get to see any of it, reorder
it, or swap one piece without regenerating everything.
For a repeatable ad workflow, that opacity is the whole problem. You want to hold
the body of the ad fixed and change only the hook. You want to reuse the same
voice and the same brand-consistent product shot across ten variants. You want to
know that variant B differs from variant A by exactly one node — because that's
the only way a test tells you anything.
A node graph makes the pipeline a first-class object. Every step is a node you
can see, move, disconnect, duplicate or mute. The connections between nodes are
the recipe. Two boards that look different produce different videos for a reason
you can point at — not because the model rolled differently that afternoon.
The nodes, grouped by what they do
The palette is organized into five groups. You don't need all of them; a working
ad graph can be as small as three nodes.
Input — what the generation is anchored to.
Prompt (your text direction), Ref image and Ref video (drop in your own
product shot, model photo, or a clip you want the output to echo), and Camera
for shot control. Reference nodes take real file uploads, so the generation is
anchored to something you actually own — not a generic stock render.
Generate — the part that makes pixels move.
Image and Img → Img for stills, then the video steps: Image → Video,
Text → Video, and Ref → Video. Upscale cleans up resolution at the end.
Every runnable graph needs exactly one video node — that's the required step;
everything else is optional garnish.
Audio — voice and sound.
Voice (AI voiceover), Subtitle (burned-in captions, which lift retention on
sound-off feeds), and BGM for a music bed.
Advanced — structure for longer or more consistent pieces.
Storyboard and Consistent SB break a concept into shots, Tri-view and
SB script help plan them, and Viral analysis reads a reference for what's
working.
Output — assembling and finishing.
Composer stitches the pieces into the final cut, Thumbnail and Metadata
prep it for publishing, and Output is the terminal node.
Building your first graph, node by node
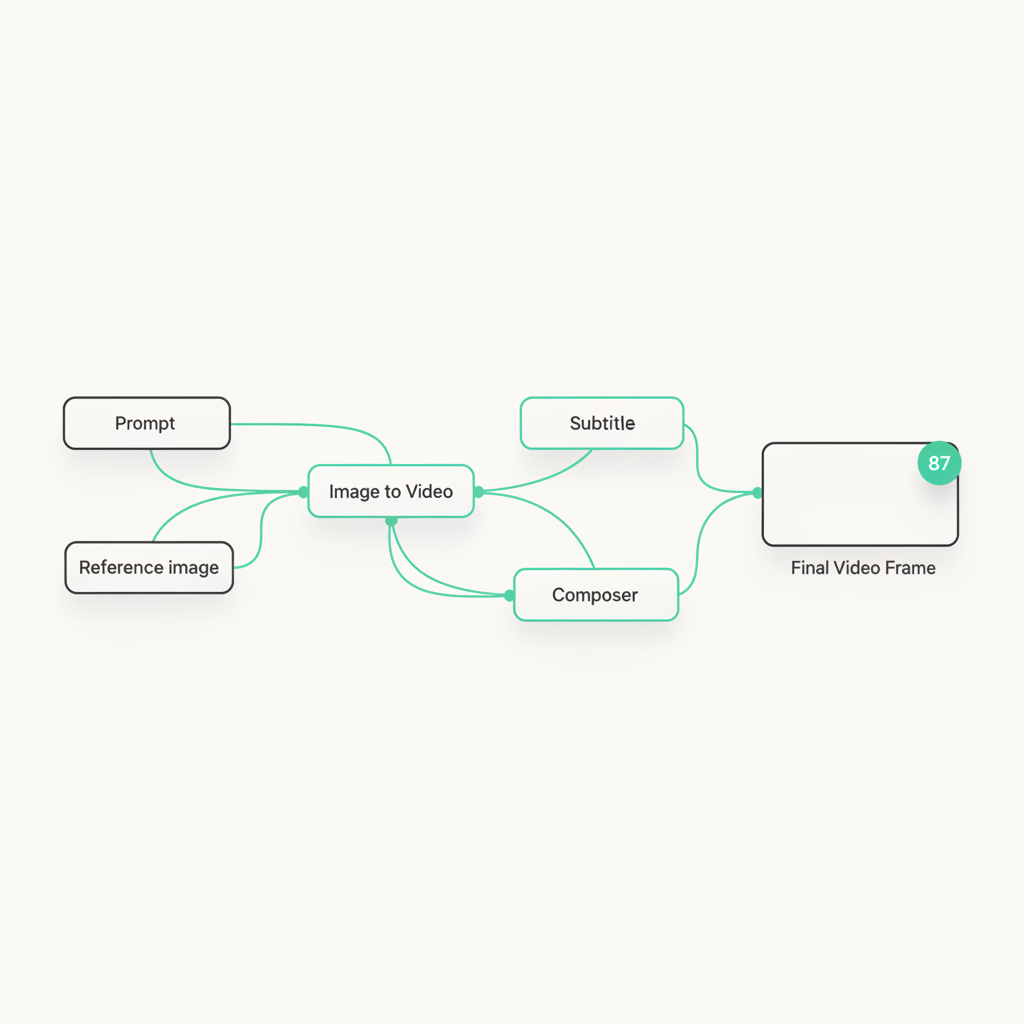
The smallest useful ad workflow is three nodes:
- Prompt → Text → Video → Output. Type your ad direction into the prompt
node, wire it into a video node, wire that into output. Run it. That's a
complete generation — no image step, no audio, just a scored clip.
Now grow it into something that looks like a real ad:
-
Add a reference. Drop a Ref image node, upload your product shot, and
wire it into a Ref → Video node instead of text-to-video. Now the model is
generating your product, not an approximation of it — the difference between
"an AI clip" and "an ad for my thing."
-
Add voice and captions. Wire Voice and Subtitle nodes into the
composer alongside the video. Because they run in parallel off the same graph,
adding them doesn't rebuild the video — it layers on top.
-
Compose and finish. A Composer node stitches video, voice and captions
into the final cut; Thumbnail and Metadata get it ready to ship.
The rule to remember: the wiring is the workflow. If a node isn't connected
into the path that reaches Output, it doesn't run. Want to A/B two hooks off one
body? Duplicate the prompt node, change the copy, and re-run — everything
downstream stays identical, so the only variable is the hook.
Save it once, run it forever
A graph you build by hand is a nice demo. A graph you save is a machine.
Name a board and it becomes a reusable workflow on your account. Autosave keeps
it current — edits sync back on a debounce, and a local draft survives a refresh
or a closed tab, so you never lose a board mid-build. Open it on another machine
and it's there, exactly as you left it.
That's what turns the Canvas from a toy into a testing rig. Your winning
structure — reference-anchored product shot, proven voice, captions, the compose
you like — gets saved once. Every new product or new hook is a one-node edit and
a re-run, not a rebuild from scratch. This is the practical answer to how do I
make ad videos at scale without a shoot each time: you don't scale the shoots,
you scale one graph.
The scores are wired into the graph
Here's the part no ComfyUI clone gives you. HeyDreaming's whole pitch is scored
before you spend — every cut graded on Hook, Retention, CTA and Brand-fit. Those
scores aren't a separate report you run later; they come back with the
generation, on the same board you built.
So the loop is tight: wire the graph, run it, read the four numbers, change one
node, run again, watch which number moved. You're not guessing whether the new
hook is better — you're reading a hook score next to the old one. That's the
difference between iterating like an engineer and gambling on the prettiest
render.
It's the same reason the build has to be fast and lossless. Real uploads on the
reference nodes, autosave on every board, and node-level mute/bypass so you can
turn a step off without deleting it — all of it exists to keep the
build-run-read-iterate loop from stalling. Friction in the build is friction in
the test.
Where this fits
If you've used a node editor before — ComfyUI, a compositing tool, any
graph-based DAG — the Canvas will feel immediately familiar: right-click to add
nodes, copy/paste and duplicate, undo/redo, box-select, fit-to-view, a search
popup on double-click. If you haven't, start from a template and change one node
at a time.
Either way, the point isn't the node graph for its own sake. It's that ad testing
has a shape — hold everything fixed, change one thing, read the result — and a
visual pipeline is the only interface that lets you see you're doing exactly
that. One product URL becomes a graph; one graph becomes a hundred scored
variants; the scores tell you which one to spend on.
Open the Canvas tab, drop a template, and wire your first three nodes. By the
time you've read this far, you could have a scored clip on the board.